Nowadays setting up a website is pretty easy, and the most popular way to start is using WordPress. It is a content management system written in PHP paired with SQL database. Its base functionality can be extended with a plethora of additional plugins, themes and other extensions.
Preface
This tutorial requires that you have a basic server set up already, and that you have Apache, PHP and MySQL installed as well. Take a look at requirements above for direct links to those tutorials
Requirements to set up
Optional
- Domain – check how to get yourself a free one
Downloading WordPress
If you followed my Apache guide you already have a folder ready for your website. For the sake of this tutorial let us assume that you are using the following folder
/var/www/your_website_folderThe easiest way to download WordPress is to navigate to the folder where your website will reside. Move there using
cd /var/www/your_website_folderIf the folder contains any files, and it should not at this point, use the following to empty it
sudo rm -R *Now download the latest WordPress package using wget command
sudo wget http://wordpress.org/latest.tar.gzUnpack the file with
sudo tar xzf latest.tar.gzContents will be unpacked into a subfolder called wordpress. Move files into the folder you are currently in righ now with the following code
sudo mv wordpress/* .Now just remove the unnecessary folder and the initial package with
sudo rm -rf wordpress latest.tar.gzYou should be all set up at this point, but just to be sure – check if your folder contains wp-load.php, among other files and folders, with the following command
ls -lI mentioned it in Apache tutorial, but a refresher is in order. Change ownership of both the folder containing your site and any files within to Apache www-data user, and allow it to write inside with following commands
sudo chown www-data:www-data -R /var/www/your_website_folder
sudo chmod 770 -R /var/www/your_website_folder
WordPress configuration
In order to configure your WordPress just open your browser and in the address box type the IP of your server on the local network, or your domain name if you have configured everything already.
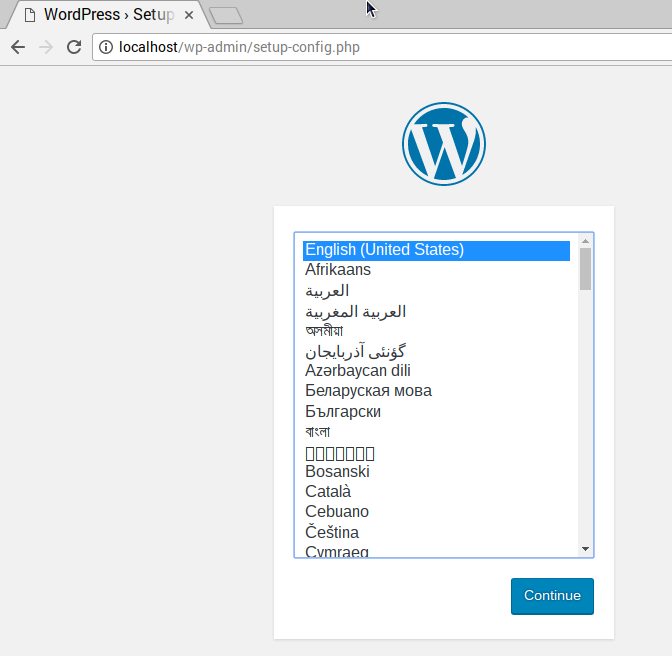
You should see the following screen

After you select your preferred language you will be presented with a welcome screen. Just press “Let’s go!” at the bottom.
Now you will need to fill out some information. For a refresher on how to create databases and MySQL users navigate to this page
- Database name – input the name of the database you have set up
- Database username – input the name of the database user you have permissioned to the database
- Database username password – input the password for the database user you created
- Database host – put localhost, if not filled out automatically
- Table prefix – leave default wp_ prefix
Now proceed with prompts until you get to the page where you will set up the website title, default website admin, and the website address. Fill everything as you see fit and hit the Install WordPress button
Logging into your new site
Upon initial arrival, you will be logged in automatically, but if you want to access your website admin panel from a different device, or you simply clear your cookies, use the following link to log in
http://your.domain.com/wp-admin
or
http://your.local.ip.address/wp-admin
Conclusion
Setting up WordPress is a fast and easy way to expose yourself to the internet. This tutorial showed you how to set up the basics.
Now is a good time to secure your website with a certificate so that your password is not sent in the clear but encrypted. Check out the Certbot tutorial!
Take a look at basic WordPress security tutorial as well.
