
So you want to host a website? Apache web server is something that will allow you to do it. Basically it is an application that serves a website to anybody connecting to your server with a browser. Apache web server can serve a website, a blog to your users or enable them to access email on your server. And much, much more. If you want to host anything you simply need Apache.
Additionally, if you want to use an SSL certificate for encrypting data sent between you (or other users) and your server you simply need control over a website and a domain to prove that you are who you are saying you are.
Nginx is an alternative http server, however, as I prefer Apache this will not be covered. At least for now.
Installing Apache
This part will be straightforward. Use the following command
sudo apt install apache2After installation is complete your server is ready. Granted, it is configured in the most basic way possible and so far we can only utilize plain html, but it already works.
Accessing your website
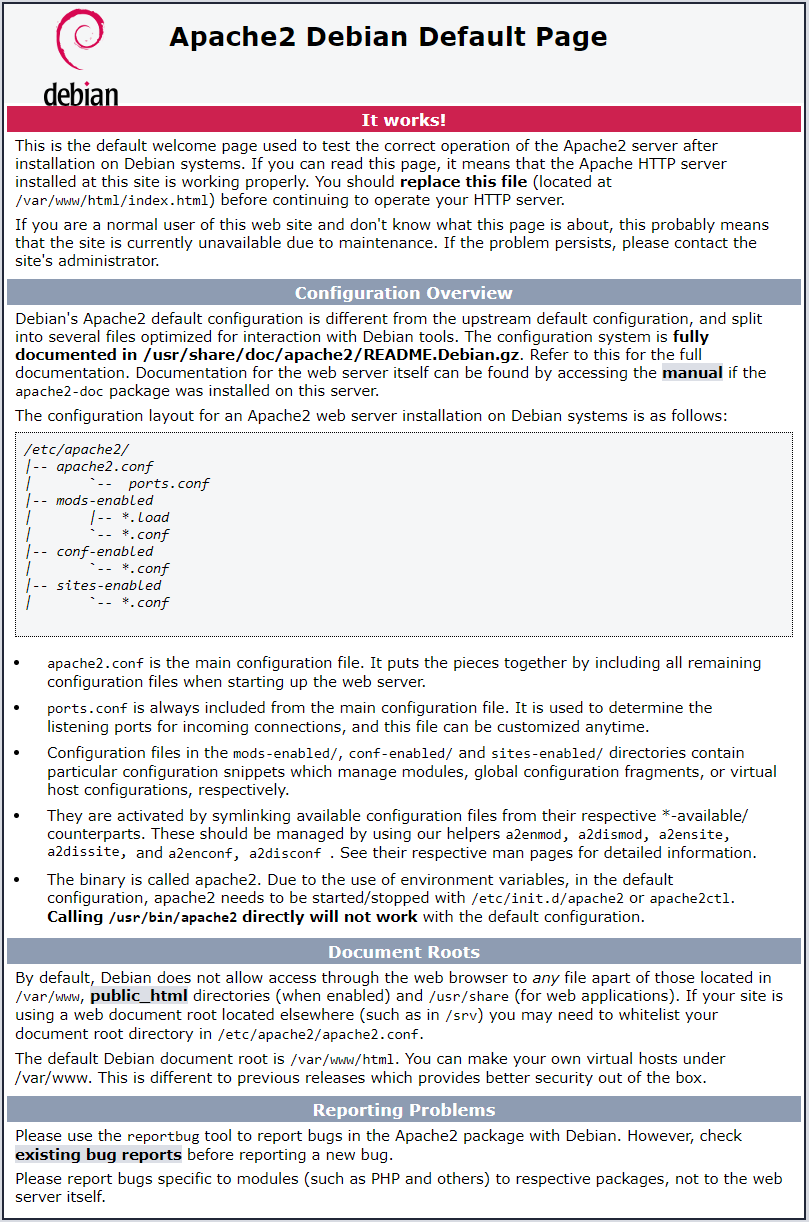
Open your web browser and in the address bar type the IP address of your Raspberry Pi web server (or domain address if you have configured DNS). You should see a page similar to the below screen shot
Apache web server basics
By default Apache2 serves websites from the following folder
/var/www/html/The default website is placed there to showcase that it is in fact working. You can serve your website from virtually any folder you want, but again /var/ folder and especially /www/ subfolder is a good choice. You need to have a separate folder for each site you plan to host. Like so
/var/www/codedoneright.eu/PUBLIC_HTML/
/var/www/forum.codedoneright.eu/
etc.
When it comes to the number of sites you can host only two things are constraining you – bandwidth of your internet connection and your server performance. Obviously you will not be able to host a website with hundreds of pages accessed by millions of users on a daily basis, but a small selection of pages for personal or small business use is not out of the question.
Allowing Apache2 to access your website
In order for Apache to serve content from folder that you created for your website it needs access to it. By default whoever saves a file, owns it. If you save files as the user john1234, website files will belong to john1234.
Apache on the other hand uses a specific user account to access those files. The user is called
www-dataBy default it has permissions to read, so a static, non-interactive page will be displayed normally, but if you want anything more you need to change both permissions, and owner of those files
For each and every folder you create for a website, after you place your files there run the following code
sudo chown www-data:www-data -R /var/www/your_website_folder
sudo chmod 775 -R /var/www/your_website_folder
The above code will change ownership of the folder and any files within to Apache www-data user, and its group. Moreover, it will allow the user and its group to freely modify those files, while allowing other users to only read.
Access to www-data owned files
Your default user, will not be able to modify contents afterwards. Files and folders simply belong to someone else now. In order to allow us to change those files AND retain Apache ownership of them we will add our default user to Apache www-data group with the following command
sudo usermod -aG www-data $user_nameSubstitute $user_name with the name of user that will modify website files.
CAUTION All modified files will be owned by your current user (or root if you used sudo), remember to run chown command after you are done with changing files.
Apache2 website basic configuration
Apache serves sites that have configuration files in the following folder
/etc/apache2/sites-available/The most basic config looks like this
<VirtualHost *:80>
        DocumentRoot /var/www/html
        ErrorLog ${APACHE_LOG_DIR}/error.log
        CustomLog ${APACHE_LOG_DIR}/access.log combined
</VirtualHost>
Configuration files should be named
example.com.confhowever, you can name the file anything as long as it has .conf suffix.
Having a configuration file in sites-available folder is not enough, you also need to enable the site with the following command
sudo a2ensite example.comNote that you do not have to include .conf extension in the command
After enabling the site, Apache creates a link to the config file from sites-available to the folder /etc/apache2/sites-enabled/ it will have the same name, however it will be just a link, not the actual file. You can then modify the file either by accessing it through the link or the file directly. Any changes will be written to the file in sites-available folder.
CAUTION You need to restart Apache or just reload the config for any changes in your configuration files to take effect.
Use the following command
sudo service apache2 restart
or
sudo service apache2 reload
Apache config explained – virtual hosts
Great feature of Apache 2 web server are Virtual hosts. In short, they allow for configuring as many sites on one server as your bandwidth and server performance allow for. Take a look at the example configuration above. I will explain what those directives mean
<VirtualHost *:80>
...
</VirtualHost>
This is the frame of every website on your server. It will enclose all directives that concern a single page. The fragment *:80 means any connection via unencrypted connection through a browser (http protocol).
DocumentRoot /var/www/htmlDocumentRoot tells the server where exactly is your website. Like in example above it can be /var/www/codedoneright.eu/PUBLIC_HTML/
CAUTION Apache looks for a file called index.html or index.php in DocumentRoot folder to serve it as the landing page. Other files will be ignored for the purpose of serving the initial page. You will get an error message instead of the site if one of those files is not found!
ErrorLog ${APACHE_LOG_DIR}/error.log
CustomLog ${APACHE_LOG_DIR}/access.log combined
Those two lines tell Apache where to write log files. You can rename them to whatever you wish. Keep in mind that you should have separate logs for each and every page you have! Do not instruct Apache to write everything into one log file as you will not be able to diagnose problems that way!
- ErrorLog – for errors
- CustomLog – for checking who (what IP) accessed your server and what files were sent (served to a browser)
By default Apache saves all log files in the following folder
/var/log/apache2/Serving multiple sites form one web server
We know how to configure Apache web server to host a single site, how about a second one?
We will simply add an additional VirtualHost to our configuration file or create an additional configuration file. It does not matter which route you will take, but for simplicity sake we will use a single file for all of our VirtualHosts.
CAUTION I will assume you already have a domain, as serving multiple sites only having an IP address is a bit more tricky. Take a look here to learn how you can get a free domain, just for testing purposes. And here to learn how to configure your domain and create a subdomain.
Look at the below example
<VirtualHost *:80>
        ServerName example.com
        DocumentRoot /var/www/example.com
        ErrorLog ${APACHE_LOG_DIR}/example.com_error.log
        CustomLog ${APACHE_LOG_DIR}/example.com_access.log combined
</VirtualHost>
<VirtualHost *:80>
        ServerName forum.example.com
        DocumentRoot /var/www/forum.example.com
        ErrorLog ${APACHE_LOG_DIR}/forum.example.com_error.log
        CustomLog ${APACHE_LOG_DIR}/forum.example.com_access.log combined
</VirtualHost>
Now we have two separate websites defined in our config file – example.com and forum.example.com. In order for Apache to know what to serve we are using additional two lines
ServerName example.com
DocumentRoot /var/www/example.com- ServerName – instructs Apache to use this particular VirtualHost if the user types example.com in the address bar
- DocumentRoot – instructs Apache where are files that should be served for this particular VirtualHost (folder with the website)
CAUTION remember about changing log file names as well!
CAUTION bear in mind that both addresses, example.com and forum.example.com need to point to the same IP address in your DNS configuration, see here how to point your website address to your router and here how to point your router to your server
1 address, 2 websites – using an alias
Ok, what if we want to retain a single address and just serve multiple websites by adding /forum to our domain?
That can be done as well but is a bit more tricky. We have to use an alias. In order to do that we need to define it first. We will do that in the following configuration file
/etc/apache2/mods-enabled/alias.confDefault configuration looks as follows and gives us a pretty good idea how aliasing works in Apache web server
<IfModule alias_module>
        # Aliases: Add here as many aliases as you need (with no limit). The format is
        # Alias fakename realname
        #
        # Note that if you include a trailing / on fakename then the server will
        # require it to be present in the URL.  So "/icons" isn't aliased in this
        # example, only "/icons/".  If the fakename is slash-terminated, then the
        # realname must also be slash terminated, and if the fakename omits the
        # trailing slash, the realname must also omit it.
        #
        # We include the /icons/ alias for FancyIndexed directory listings.  If
        # you do not use FancyIndexing, you may comment this out.

               Alias /icons/ "/usr/share/apache2/icons/"

               <Directory "/usr/share/apache2/icons">
                       Options FollowSymlinks
                       AllowOverride None
                       Require all granted
               </Directory>

</IfModule>

# vim: syntax=apache ts=4 sw=4 sts=4 sr noet
If we want to serve a website from example.com and forum from example.com/forum here is what we need to modify in the alias.conf file
<IfModule alias_module>

        Alias /forum "/var/www/forum.example.com/"

        <Directory "/var/www/forum.example.com/">
                Options FollowSymlinks
                AllowOverride None
                Require all granted
        </Directory>

</IfModule>
You can add as many <IfModule alias_module> blocks as you need.
And here is how our example.com.conf file in sites-enabled will look like
<VirtualHost *:80>
        ServerName example.com
        DocumentRoot /var/www/example.com
        ErrorLog ${APACHE_LOG_DIR}/example.com_error.log
        CustomLog ${APACHE_LOG_DIR}/example.com_access.log combined
</VirtualHost>
<VirtualHost *:80>
        Alias /forum "/var/www/forum.example.com"
        DocumentRoot /var/www/forum.example.com
        ErrorLog ${APACHE_LOG_DIR}/forum.example.com_error.log
        CustomLog ${APACHE_LOG_DIR}/forum.example.com_access.log combined
</VirtualHost>
Not much different, right? We are just substituting ServerName directive with Alias directive.
Remember that your main website should be at the top. This will be the website that our alias will be added to. Remember that DocumentRoot can be wherever you like as long as it is defined in a VirtualHost.
Benefits of aliases on a web server
In theory you can use multiple VirtualHosts with subdomains defined in them and it will work just as well, but using aliases is more convenient.
One certificate for your whole website – We will talk about certificates more in just a bit, but for now you have to realize that each domain and subdomain will require separate certification. It can be in a single certificate, but for all intents and purposes you cannot use a certificate issued for example.com with forum.example.com as they are considered to be separate addresses! On the other hand example.com and example.com/forum are not.
Easier configuration – Aliases use the configuration of the main website so you do not have to add as many lines. Just define an alias, website folder and log files.
Conclusion
Now you know how to host a website or two. However, your server is not serving anything other than plain html for now. In the next step we will add PHP and MySQL support. Read on!
Most services detailed on this page require using http service in one way or another. You have to learn how to use an http web server in order to follow along. If you have any questions write them in comments so that others can benefit from answers as well.