
Radicale is a daemon, which allows for storing and sharing contacts, calendars, tasks and events over the network between multiple devices. It uses CalDAV and CardDAV protocols, although it is not 100% compliant with them. It is, however, compatible enough so that any application using those protocols can make use of Radicale’s capabilities. Additionally it does not require a web server.
If you would like to deploy calendar and address book service on your server then Radicale is a solid choice. Please note that Radicale only provides a server service with no client software. There is no other functionality to it, although this is just the right amount.
Required
- python3-bcrypt
- python3-passlib
- CalDAV and CardDAV compatible client
Recommended
- apache2-utils
- SSL Certificate
Installation
Radicale daemon package can be found in repository. Just issue the following command
sudo apt install radicale python3-bcrypt python3-passlibCaution! Without python3-bcrypt and python3-passlib modules your passwords can only be stored in plain text. Additionally, misconfigured server will not be accessible.
Note! Current Debian repositories contain version 2.1. If you are looking for additional configuration, then make sure you search for the right version.
Opening ports for external access
After the installation remember to open port for Radicale on your server if you are using a firewall. Radicale uses port 5232
If you are using UFW then just issue the following command
sudo ufw allow 5232Caution! If you want to access your database from the internet then remember about port forwarding as well.
Caution! Before opening access from the internet remember about making sure that your database is protected by encryption and authentication method is set for bcrypt. More on that later.
Initial configuration
By default Radicale binds only to the server it runs on and does not allow for external access. Additionally, it is configured to accept any username/password pair. To change that, you have to edit the config
Run the following command
sudo nano /etc/radicale/configNow take a look at the example config below, this is the minimum required for proper operation as a server
[server]
hosts = 0.0.0.0:5232

[encoding]

[auth]
type = htpasswd

htpasswd_filename = /etc/radicale/users
htpasswd_encryption = bcrypt

[rights]
type = owner_only
file = /etc/radicale/rights

[storage]

[web]

[logging]

[headers]
Now for some explanation of options
- hosts – default value of 127.0.0.0:5232 means localhost, to access your database from outside change it to 0.0.0.0:5232
- type – in [auth] section defines the type of authentication mechanism, htpasswd is the preferred method, unless you know you need a different one, none means no authentication and anyone can access the database
- htpasswd_filename – defines the filepath for the file with hashed username / password pairs, the file can be stored anywhere
- htpasswd_encryption – defines the encryption type for passwords in the users file, bcrypt is the most secure
- type – in [rights] section defines read rights, owner_only means that only the owner of a given database will be able to read it, this is the recommended setting
- file – in [rights],use default file
Other settings can be safely omitted and ignored.
You can replace the default config with the one above, however, back up the original config before doing so with the following command
sudo cp /etc/radicale/config /etc/radicale/config_oldupdate-rc.d radicale enableEnabling encryption
If you are deploying Radicale on a production server that has a valid certificate, then you can use it to establish a secure and encrypted connection.
Open Radicale’s config file again with
sudo nano /etc/radicale/configand add the following entries to [server] section
ssl = True
certificate = /etc/ssl/certs/ssl-cert-snakeoil.pem
key = /etc/ssl/private/ssl-cert-snakeoil.key
Remember to change paths for certificate and the public key.
Writing log to file
By default Radicale outputs logs to stderr. In order to have actual log files you need to amend logging file and make sure that config file points to it.
Add the following to [logging] section of config file
config = /etc/radicale/logging
mask_passwords = True
This simply points Radicale to file describing logging convention and masks passwords in log files.
Afterwards amend logging file using
sudo nano /etc/radicale/loggingand replace contents with the following
[loggers]
keys = root

[handlers]
keys = file

[formatters]
keys = full

[logger_root]
# Change this to DEBUG for higher verbosity.
# Change this to WARNING to see only warnings
level = INFO
handlers = file

[handler_file]
class = handlers.TimedRotatingFileHandler
args = ('/var/log/radicale/radicale.log', 'midnight', 1, 7)
formatter = full

[formatter_full]
format = %(asctime)s - [%(thread)x] %(levelname)s: %(message)s
Now Radicale will write its log to a file in a standard location. Additionally this configuration rotates the log at the end of the week.
Additionally, verbosity of logging level can be adjusted by replacing level argument with
- WARNING – log will show only warnings
- INFO – log will show usual amount of information
- DEBUG – useful only if you are experiencing problems
Creating users
Radicale is a multi-user server, so you can setup as many users as you like. Each can have any number of address books and calendars at their disposal.
As noted above, Radicale uses a file with hashed user-password pairs. The file can be stored anywhere, but for security reasons it should not be accessible to ordinary users.
htpasswd is a part of apache2-utils package. If you do not have it install it now.
Configuration above assumes the use of htpasswd for authentication, usage is quite easy and intuitive, take a look at the syntax
htpasswd [-options] [path] [user] [password]- [-options] – the only two options that you need now are
- -B – Force bcrypt encryption of the password (very secure)
- -c – Create a new file
- [path] – absolute path for the file with user/password pairs
- [user] – username
- [password] – htpasswd allows for providing the password as attribute if you add -b option, however, for security reasons this should not be done
Caution! On the first run use -c option to create the file. It is a normal plain text file, so it can be created with touch command as well, -c just streamlines the process.
Caution! -c option will substitute any data in the specified file. Use only to create the initial file.
In order to create the first user run the following command
sudo htpasswd -cB /etc/radicale/users $USERRemember to substitute $USER variable with actual user name.
Starting the service
Radicale should automatically start as a service, however, if it happens that it did not start issue the following command
sudo service radicale enableAdditionally, after any changes to config you should restart the service with the following command
sudo service radicale restartConnecting to Radicale WebUI
In order to access Radicale’s web interface navigate to the following address
your.server.ip.address:5232You will be greeted with the following screen
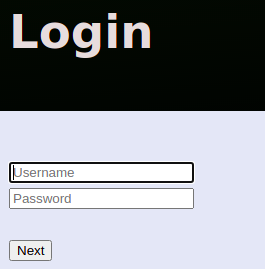
Creating calendar or address book
The process of creating a calendar or an address book is not complicated at all, however, you have to do it via web interface. Developers discourage manual creation of files.
Provide credentials of a user created in the previous step and click Next, you will be taken to the Collections screen
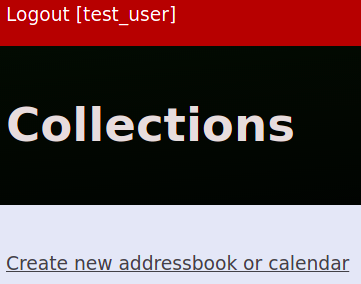
The process is very straightforward. Simply click on Create new addressbook or calendar and you will be taken to the following screen
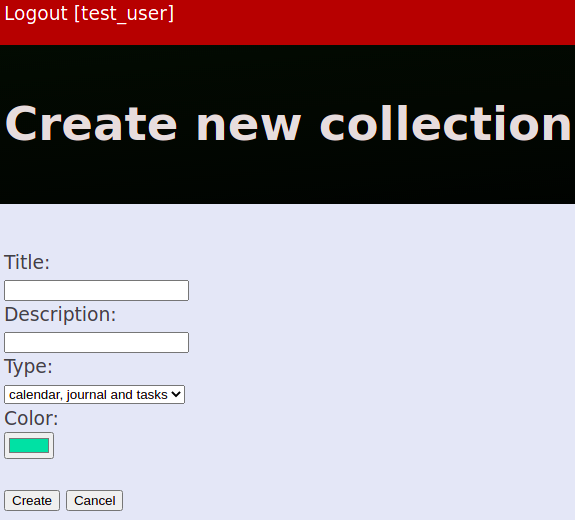
Now fill out the form for your new collection
- Title – required, provide a title for your new collection
- Description – optional field
- Type – required, select what type of collection you want to create, there are two main options that you should focus on right now
- addressbook – CardDAV compatible address book
- calendar, journal and tasks – CalDAV compatible calendar
- Color – optional field
After filling out the form simply click Create and you will be taken back to the Collections screen.
Data for content manager
Your new collection is ready and you can connect to the server via your favorite content manager. However, remember that your content manager has to support CalDAV or CardDAV standards.
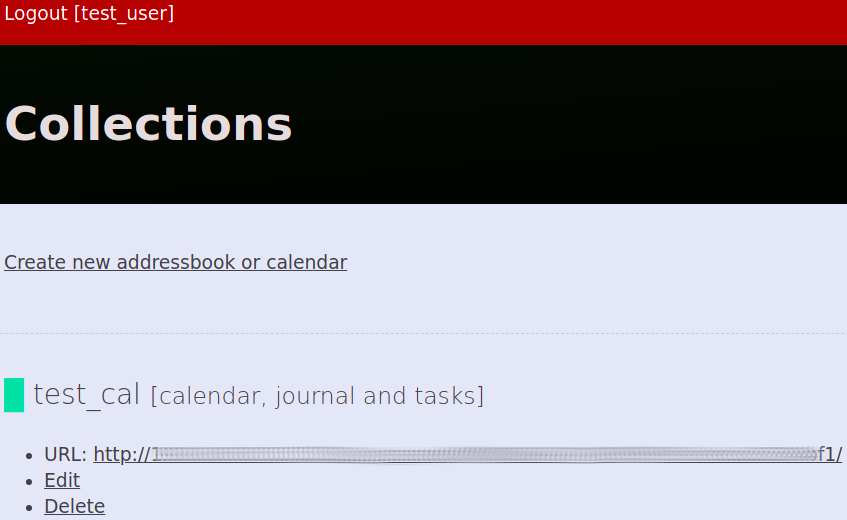
- test_cal [calendar, journal and tasks] – name and type of your collection
- URL – address to your collection on the server, when asked for location provide this address
- Edit – allows you to change the name, description, type and color of the collection. This action does not modify any collection data
- Delete – deletes the collection, this action cannot be undone
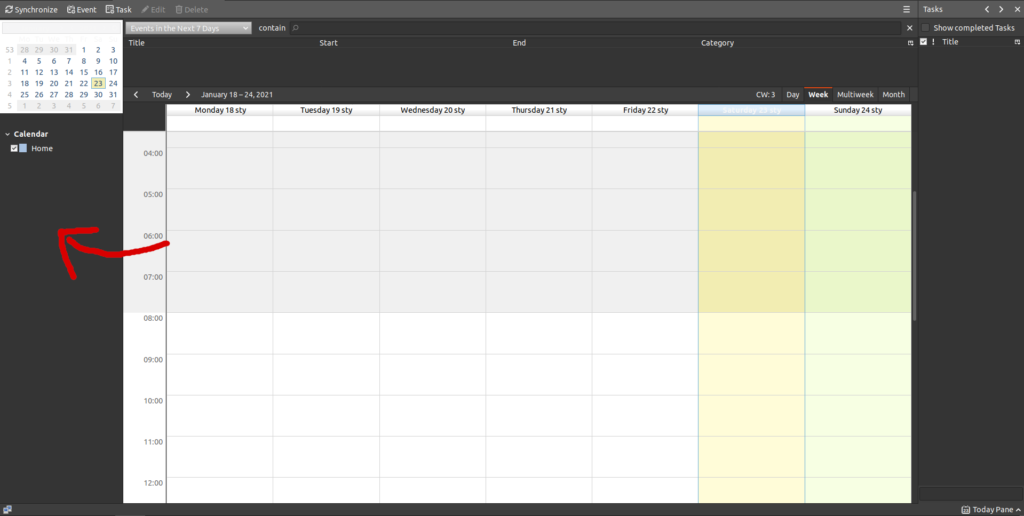
Adding a calendar to Thunderbird (native)
Now that Radicale is running and your new collection is ready, you can add the calendar to Thunderbird mail client.
Note! If your Thunderbird version (68 and below) does not have calendar tab, install add-on called Lightning.
- Open calendar tab
- Right click below the default Home calendar on the left hand side and select New Calendar…
- Select On the Network and click Next
- Now provide
- Format – CalDAV
- Username – username for Radicale
- Location – full URL for that user’s collection
- Offline Support – leave checked
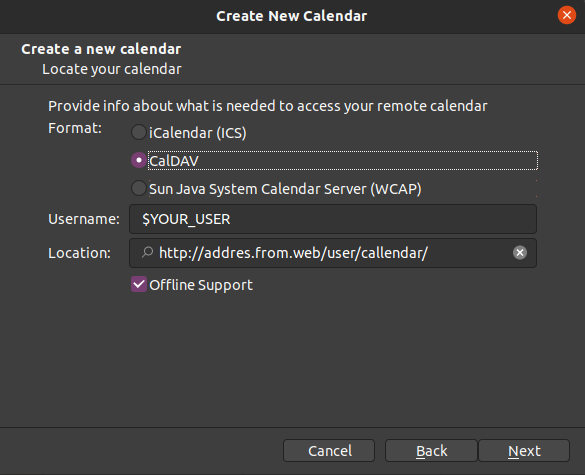
- Click Next
- Now provide
- Name – a name for your calendar, will be visible only on this PC
- Email – chose local email to associate the calendar with
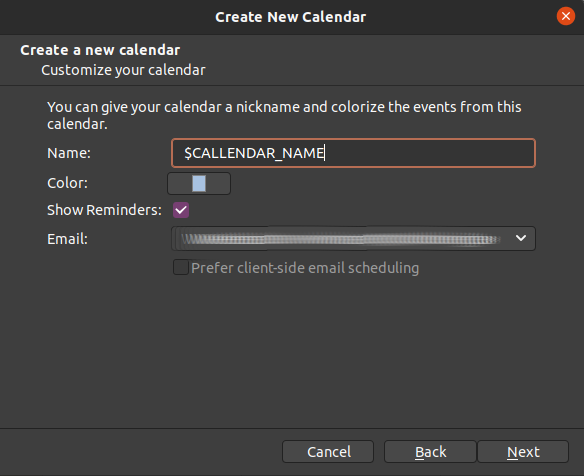
- Click Next
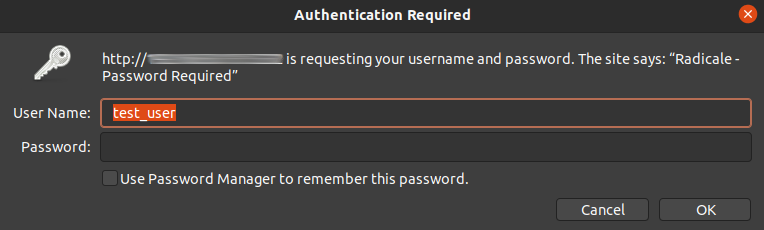
- If your authentication method requires a password, Thunderbird will ask for it now
- You can ask Password Manager to remember this password
- Click OK
- Finalize the setup by clicking Finish
You have successfully subscribed to Radicale calendar on your server. However, for now it is empty. You can test if all went well by adding an event or a reminder.
- Navigate to Events and Tasks in Menu Bar
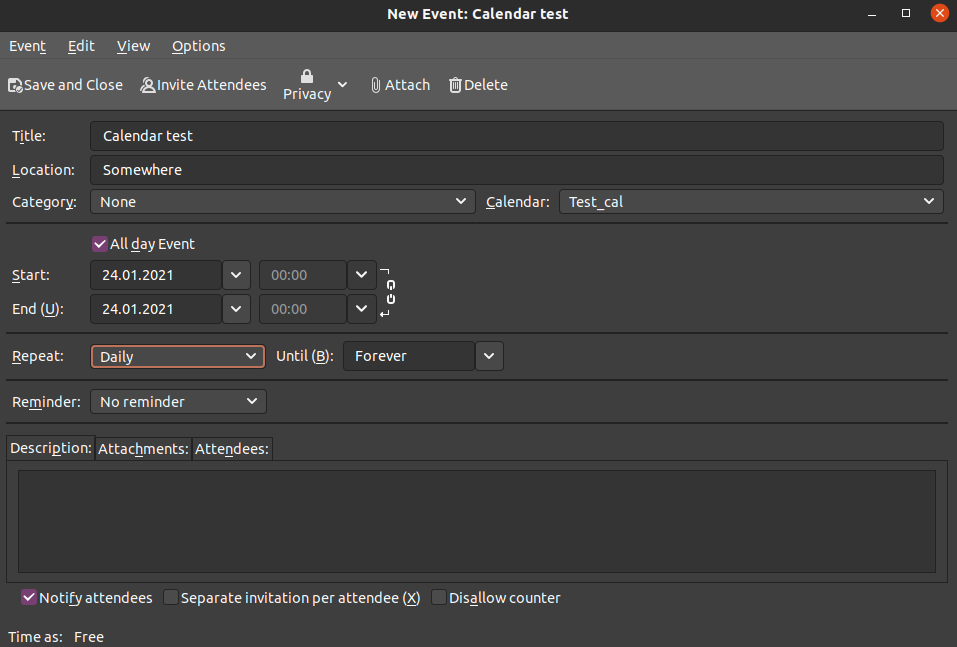
- Select New Event (Ctrl+I)
- Fill out the form as desired
- Make sure to select your Radicale calendar
- You can invite other people by clicking on Invite Attendees
- In a separate window provide email addresses
- Each attendee will receive an email with event details
- When you are done simply click on Save and Close
- Your newly created event will show in your calendar
Adding address book and calendar to Thunderbird (add-on)
Thunderbird does not utilize CardDEV protocol by default. In other words, you need to install two add-ons called Provider for CalDAV & CardDAV and TbSync. Former provides a CardDAV and CalDAV synchronization support, and the latter adds a synchronization mechanism.
Installing add-ons
- First, navigate to Tools in Menu Bar
- Then Add-ons
- Inside Find more extensions searchbox put “CardDAV” like so and press Enter

- Now, find the following two extensions, click on Add to Thunderbird and confirm by clicking Add button


- After the installation restart Thunderbird
Synchronising with the server
- Now, navigate to Edit in Menu Bar, and select Synchronisation Settings (TbSync), TbSync account manager window will open
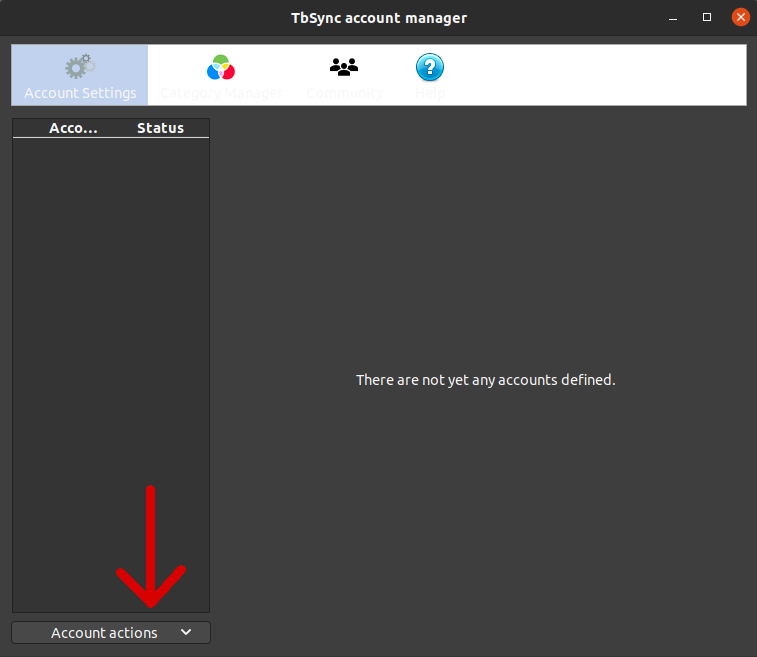
- Select Account actions, next Add new account, and then CalDAV & CardDAV
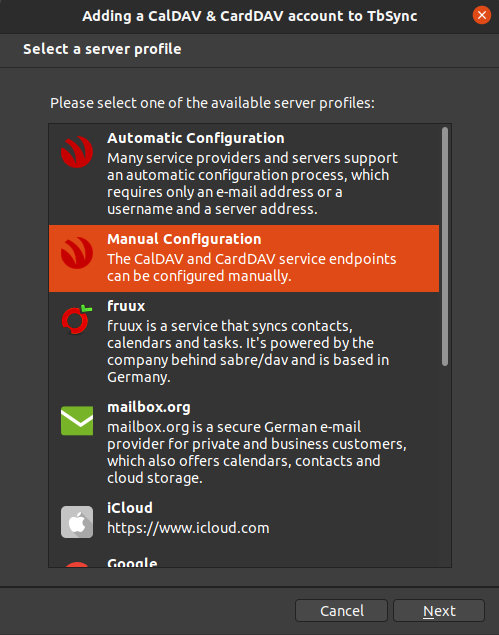
- Additional window will open, select Manual configuration from the list and click Next
- The supported list includes Google, Yahoo! and iCloud should you wish to add those as well, you can do that at a later time
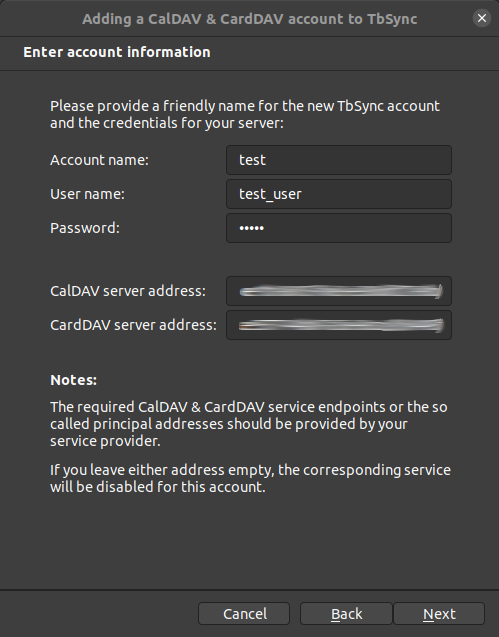
- Now, provide all information needed for access to your Radicale account and addresses of calendars and address books
- TbSync assumes you have only one CalDAV & CardDAV collection, you can add more collections later using the same credentials, but different links to a collection
- Account name – name that will be used for address book and callendar
- User name – Radicale user name
- Password – Radicale user password
- CalDAV server address – address to your callendar (URL field from Radicale’s WebUI)
- CardDAV server address – address to your address book (URL field from Radicale’s WebUI)
- After you are done, click Next
- The following window is just a confirmation that credentials and links provided have been verified successfully, simply click on Finish
- Your account has been added, however, by default it is not synchronized
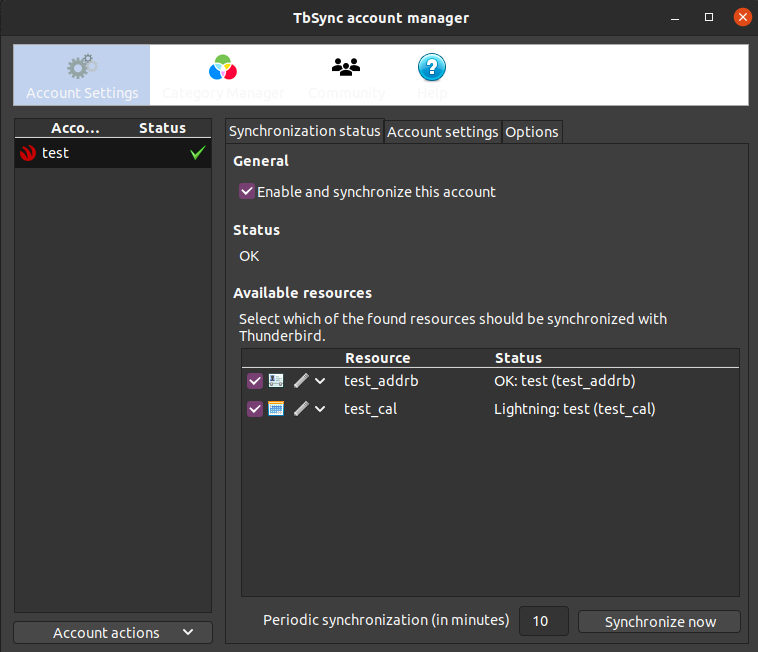
- Select the account on the left hand side of the window and
- In Synchronization status tab check Enable and synchronize this account
- Below that a new list should appear with your callendar and address book that you set up on the server via WebUI, check fields next to them
- TbSync will alert you that your account is out of sync
- Set the Periodic synchronization for whatever is desired, 10 minutes or an hour should suffice
- Click on Synchronize now
- A green check mark should appear next to your account name, you can close the window now
Accessing your callendar and address book
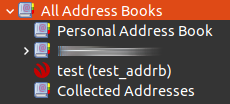
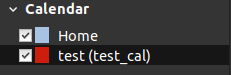
Now that your callendar and address book have been properly set up you can start using them to your heart’s content. In order to access them simply go to Lightning callendar or click on Address Book in Thunderbird’s main window. You should see your new items there
You can test if all works well by adding some dummy entries and syncing with another device.
Removing a callendar or an address book in client software, for example Thunderbird, will have no effect on their content. You will only remove access, database will remain on the server.
In order to remove the database you have to navigate to
/var/lib/radicale/collections/collection-rootThere you can delete whole user folders or navigate further to remove collections one by one, or even single addressbook entries. This is for educational purposes only as it is fairly easier to amend a contact list via client software or delete whole collections from WebUI.
Troubleshooting
Radicale is not accessible from localIP:5232
Check if the service is running, and if so, does it report any errors with
sudo service radicale statusMost likely culprit is the authentication method. Make sure that your config is correct and that you are using htpasswd.
Conclusion
If you want a BigTech separated contact database or you are setting up a small business, non-government entity or a large guild server then this just might be the thing for you. Remember that it is free. Moreover, it is always better to have an independent service, and any invitations sent via CalDEV protocol are compatible with Google calendar. As always, the question is whether you actually need it or not. Having a fall-back option is always a good idea, even if never used, it provides a peace of mind.