
In this tutorial I will show you how to set up an email server on your Raspberry Pi. Read carefully and do not skip any steps!
CAUTION unfortunately some ISPs simply block email protocols for sending email. Their rationale is “we are fighting spammers”. Changing ISP or upgrading to a business/static IP package is the only thing you can do in such a case.
CAUTION this tutorial assumes you are using IPv4 as I have no experience with IPv6.
Requirements
In order to receive email you have to have a domain. It can be a free one from a registrar like freenom.com, and for testing purposes it will do nicely. However, if you plan on actually using the email, you should invest in a proper domain.
SSL certificate is not required, however, your email will be sent in the open without it. This is NOT advised and that is why I am marking it as a necessity. The tutorial assumes usage of an SSL certificate. It is free so there is no excuse for not using one. Check out my tutorial here on how to obtain a certificate.
A bit of theory
Before we dive into the tutorial itself, you need to understand a thing or two about email servers.
First of all, email server is a service that absolutely requires 24/7 uptime of your machine if you plan to receive emails. You simply cannot just switch your server on to download stuff and turn it off again. This is because when an email is sent, a transfer server is looking up your server to deliver the message. If it cannot deliver it instantly, it just gives up telling the sender that your server is unreachable. You really do need your machine to run 24/7.
Email server protocols is yet another thing to be mindful of. We have two – POP3 and IMAP. In short POP3 downloads all messages to a device accessing the email server, and messages are erased form the server. IMAP only synchronizes your messages so that they can be accessed by different means, they stay on the server. You can read more about POP and IMAP on Wikipedia. Due to obvious advantages, you will set up only IMAP server, as POP3 is obsolete and not useful anymore.
Configure your domain properly
If you already have a domain, you need to configure it for email now. I have a separate tutorial on that, so I will simply point you to this page rather than repeat myself. Once you have that sorted out, come back to this tutorial.
Installing Postfix and Dovecot
This one is quite easy. Just issue the following command
sudo apt install postfix dovecot-core dovecot-imapdWhen asked about mail server configuration type, select Internet Site.
When asked about System mail name, type your $FQDN. Postfix will read the domain from your system information. If it is not displayed here then consider using raspi-config to rectify that. Check bottom of this tutorial for a hint.
Email folders
There are a few ways to set up folders for your mail. In my opinion, however, it is best to keep messages in the user’s home folder, each one in a separate file.
Run the following commands
sudo maildirmake.dovecot /etc/skel/Maildir
sudo maildirmake.dovecot /etc/skel/Maildir/.Drafts
sudo maildirmake.dovecot /etc/skel/Maildir/.Sent
sudo maildirmake.dovecot /etc/skel/Maildir/.Spam
sudo maildirmake.dovecot /etc/skel/Maildir/.Trash
sudo maildirmake.dovecot /etc/skel/Maildir/.Templates
The above will create mail directories in /etc/skel folder. This is a special folder that serves as a template for any new system account. If you create a new account everything from skel will be copied into the user’s home directory. Including our newly created email directories.
The user you are currently logged in as do not have those folders just yet. You need to copy them to your user’s home directory. Run the following
sudo cp -r /etc/skel/Maildir ~/
sudo chown -R $USER:$USER ~/Maildir
sudo chmod -R 700 ~/Maildir
Substitute $USER with your username. Do not set folder permissions other than 700! Setting them to 700 means that only the owner can read, write and execute files in that directory.
Postfix configuration
Now you need to configure Postfix so that you can send email properly. Modify main.cf file with the following command
sudo nano /etc/postfix/main.cfNow modify the following two entries so that they look exactly like the below
inet_protocols = ipv4
myhostname = $FQDN
$FQDN being the domain you are using. Again, this should be configured automatically, but I am specifying this just in case.
Now add the following at the bottom
smtpd_recipient_restrictions =
	permit_sasl_authenticated,
	permit_mynetworks,
	reject_unauth_destination

smtpd_helo_required = yes
smtpd_helo_restrictions =
	permit_mynetworks,
	permit_sasl_authenticated,
	reject_invalid_helo_hostname,
	reject_non_fqdn_helo_hostname,
	reject_unknown_helo_hostname
	check_helo_access hash:/etc/postfix/helo_access

smtpd_sasl_type = dovecot
smtpd_sasl_path = private/auth
smtpd_sasl_auth_enable = yes

smtpd_tls_auth_only = yes

home_mailbox = Maildir/
mailbox_command =
CAUTION if said entries exist then comment them out and put everything at the bottom. Order in this section matters!
The above configures Postfix so that bots and spammers cannot send emails claiming to be you, in short. Additionally it configures helo handshake required to bypass spam filters. Think of it as the server saying “Helo, I’m $FQND, please accept email from me.”
Set certificate paths changing the following two lines
smtpd_tls_cert_file=/etc/ssl/certs/ssl-cert-snakeoil.pem
smtpd_tls_key_file=/etc/ssl/private/ssl-cert-snakeoil.key
Change the above, so that it reflects your certificate obtained by the Certbot in this tutorial.
Your path will look similar to the following
smtpd_tls_cert_file=/etc/letsencrypt/live/$FQDN/fullchain.pem
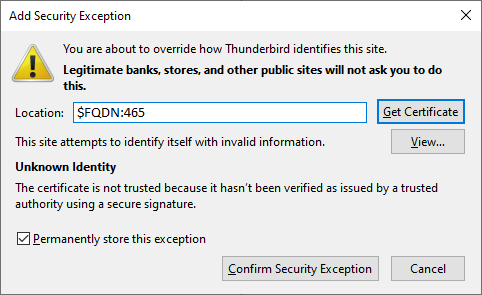
smtpd_tls_key_file=/etc/letsencrypt/live/$FQDN/privkey.pemIf you do not change the certificate path, when you try to send an email your client (e.g. Outlook or Thunderbird) will tell you that your certificate is self-signed, and that you should not trust it. Just like on the screenshot below.
Additionally, add the two following lines if your mail is delivered unencrypted
smtp_use_tls=yes
smtp_tls_security_level = encrypt
Blocking spammers with Postfix HELO controls
This one is for spam control. In case a server lies about its identity and tries to send emails as you. No legitimate server is lying about its identity, ever.
Create helo_access file with the following command
sudo nano /etc/postfix/helo_accessInside add the following
$FQDN	REJECT	Get lost - you're lying about who you are
mail.$FQDN	REJECT	Get lost - you're lying about who you are
$Your_IP	REJECT	Get lost - you're lying about who you are
localhost	REJECT	Get lost - you're lying about who you are
Now tell Postfix to map the file with the following
sudo postmap /etc/postfix/helo_accessDovecot configuration
Now you need to configure Dovecot. I will break down this section by files so it is a bit easier to work with.
dovecot.conf
Run the following
sudo nano /etc/dovecot/dovecot.confand modify
#listen = *, ::to
listen = *This removes IPv6 support. As I said before, I have no experience with IPv6 so I chose to disable it.
10-mail.conf
Run the following
sudo nano /etc/dovecot/conf.d/10-mail.confNow modify the mail_location entry so that it looks exactly like the below
mail_location = maildir:~/Maildir10-master.conf
Run the following
sudo nano /etc/dovecot/conf.d/10-master.confCAUTION Remember that sections start and end with braces { } signs. You have to comment each and every line, including braces! Leaving a brace will lead to misconfiguring Dovecot and it will not work properly!
Comment out the whole existing section service auth by adding # signs at the start of every line.
Add a new section service auth, like this
service auth {
        unix_listener /var/spool/postfix/private/auth {
                mode = 0660
                user = postfix
                group = postfix
        }
}
Uncomment port lines in the following section (and modify if it looks any different)
	service imap-login {
	  inet_listener imap {
	    port = 143
	  }
	  inet_listener imaps {
	    port = 993
	    ssl = yes
	  }
	}
10-auth.conf
Run the following
sudo nano /etc/dovecot/conf.d/10-auth.confNow modify the following two entries so that they look exactly like the below
disable_plaintext_auth = no
auth_mechanisms = plain login
master.cf
Run the following
sudo nano /etc/postfix/master.cfUncomment the following lines, you may have to add text to the fourth line
	smtps     inet  n       -       Y       -       -       smtpd
	  -o syslog_name=postfix/smtps
	  -o smtpd_tls_wrappermode=yes
	  -o smtpd_recipient_restrictions=permit_sasl_authenticated,reject
10-ssl.conf
Run the following
sudo nano /etc/dovecot/conf.d/10-ssl.confNow modify the following two entries so that they look exactly like the below
ssl = yes
ssl_min_protocol = SSLv3
#ssl_protocols = SSLv3
Set certificate paths changing the following two lines, so that they reflect your certificate obtained by the Certbot in this tutorial
ssl_cert = </etc/dovecot/dovecot.pem
ssl_key = </etc/dovecot/private/dovecot.pem
Your path will look like the following
ssl_cert = </etc/letsencrypt/live/$FQDN/fullchain.pem
ssl_key = </etc/letsencrypt/live/$FQDN/privkey.pem
Reboot
Now it is time to reboot your server so that configuration files will be reloaded. Just issue the following to reboot your machine
sudo reboot nowOpening and forwarding ports for email
The following ports are responsible for handling email
- 25
- 143
- 465
- 993
Open them in UFW if you have it installed. Learn how to do that here.
You need to forward those ports to your server on your router as well. Learn how to do that here.
CAUTION it just might happen that you will not be able to forward port 25 if you have a router from your ISP. A workaround is to use DMZ on your router. This basically means that your server will be exposed to all nasty bots and hackers from the outside and is NOT advised! You can open DMZ for a moment to check if it is working, but please disable it afterwards!
Read more about the topic in this article by Steve Gibson. If you are still thinking about using DMZ.
Using your email
Your email server is now ready. It is time to configure your email client.
If you want to configure webmail client as well, check out this tutorial.
NOTE I had problems with configuring Outlook 2016/2019 with my server. For the life of mine I could not force it to connect. I had no such issues with Outlook 2010 though.
Configuration will look the same on all email clients. I will use Thunderbird as an example.
You can download Thunderbird for Windows from www.thunderbird.net
On Debian/Ubuntu you can issue the following command to download Thunderbird from the repository
sudo apt install thunderbirdConfiguring Thunderbird email client
Without further ado, open Thunderbird
- Click on Local folders
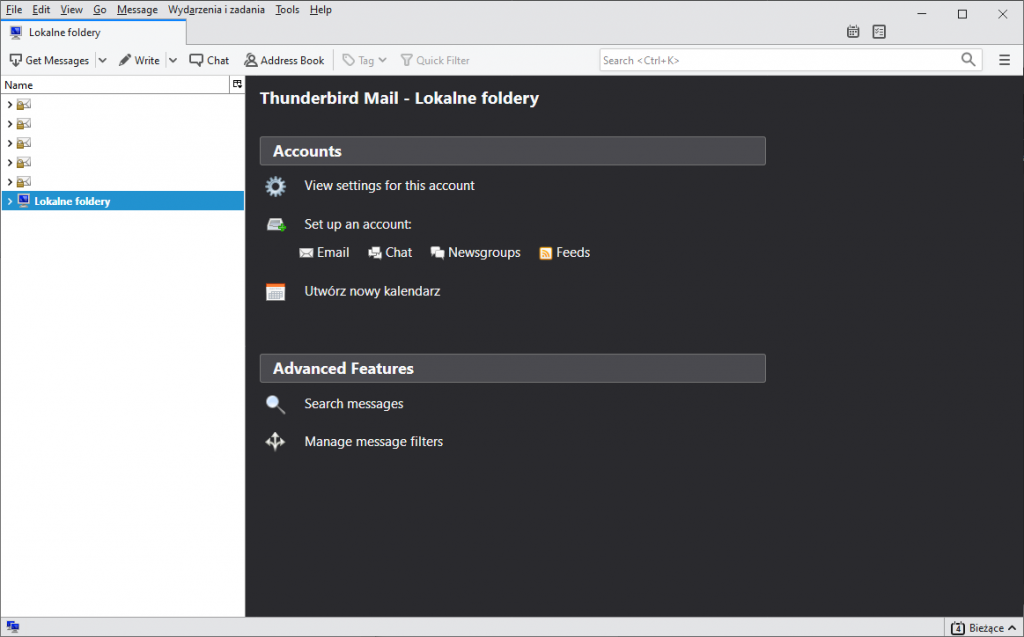
- Now click on Email in the Accounts section
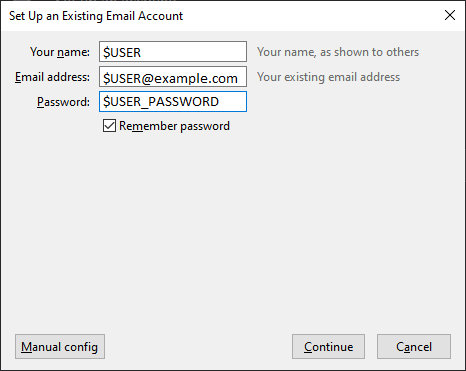
- Put down your credentials
- Your name – put down the system account user name
- Email address – put down your user name followed by your domain name e.g. john@example.com
- Password – password for your system user name
- Click on Continue
You will be taken to the following window. As your server is not on the list of known providers, Thunderbird will not be able to find the correct settings, but that is expected.
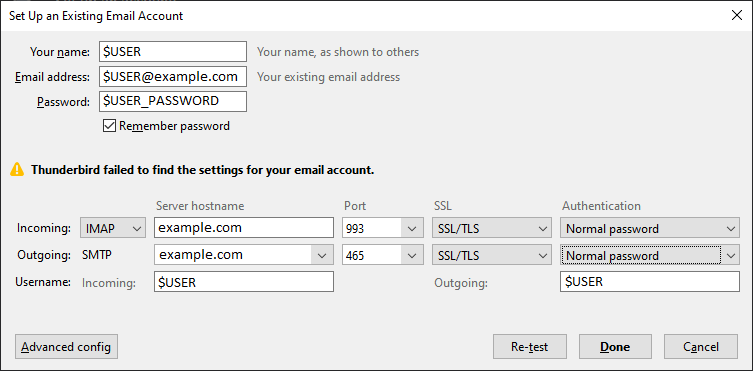
- Make sure you choose Port, SSL and Authentication settings exactly as on the screenshot above
- Server hostname – some email clients will put a full stop “.” before your domain name. Make sure to remove it!
Click on Done, and you should return to the main window.
Try sending an email now. Send it to a Google account, some email services might block your email if you have a dynamic looking IP. Your message will most likely go to SPAM folder. Unless you have a PTR domain record.
Caution if you have not changed certificate path in Dovecot configuration you will be presented with a warning about a self-signed certificate. Similar to the one I showed you in Postfix configuration. Change it now, before proceeding.
Further email testing
If all went well your email has been sent and you can do one more test
- Go to the following site – www.mail-tester.com
- Copy the email address
- Send an email from your newly created account to that address
- Make the email look ‘normal’, do not just put a single word, and do not attach anything
- Click on Then check your score
- Look at the result, it will tell you what looks not right in your email

Additional thoughts
Even if for some reason you are unable to receive email to your server. An outgoing email is still a valuable tool. It will help with other services such as WordPress, for sending password reset emails or NextCloud for reporting etc.
A word of caution
Due to reliability issues like power/internet outages and/or administrator stupidity I would not recommend such a server for signing up with services like Steam, PSN or others which you can lose access to permanently due to email loss. You can lose a domain if you fail to renew it for some reason, but I do not foresee Google overlord loosing Gmail anytime soon… On the other hand if you need a server for a non-profit, your MMO guild, local bakery, car mechanic service you are just starting, an event you are hosting or the like, have at it! You can always migrate to a full-fledged server and ditch Raspberry should the need arise down the line and with that kind of experience it will be a breeze! Everybody starts somewhere.
Conclusion
Email setup is not really that hard, however, due to your ISP it might just not work at all. Even if your ISP is not blocking outgoing mail, you will most likely deal with dynamic IP address issues and at some point you will be flagged by SPAMHAUS as a potential spammer. As mentioned before, without a proper static IP address and a PTR record running an email server is not that useful. But for basic use it will be just right.
This tutorial exists only because I found a wonderful and a detailed guide to setting up an email on Sam Hobbs’ website. Although his version is much less newbie friendly than mine. Check it out though, it is a good read!
Hello,
I have a raspberry Pi 4B 2GB running PiVPN and PiHole, I also have a Dynamic DNS service and a cron job to update my IP address this all works great. I would like to know if I can install a mail server on the same device or will there be conflicts? I would prefer to use the same device rather than buying a whole new Pi just for the mail server.
Also what is the minimum requirement for a small mail server, will a Pi zero be enough?
As long as there are no conflicts when you install packages, apt is not telling you that something will get uninstalled while trying to install new packages, you can run as many services on your pi as you want. You are limited only by the power of the pi.
And on that note Pi0 might not be the best candidate for that. It is just way too slow for.
If you want to only send emails, Pi0 should do it’s job, but if you want to receive them as well I would suggest a Pi that can be connected with cable. For reliability and stability.
You can try with Pi0 to see if you will be able to set everything up and then you can grab a second Pi for the server.